本文记录Unity Learn, Create with code 2 , Unit 3内容
在这个单元里,我们将会做一款横版的无尽过关游戏,玩家需要跳跃过障碍物避免游戏结束。学习材料请点击
让玩家跳起来
导入背景,添加玩家
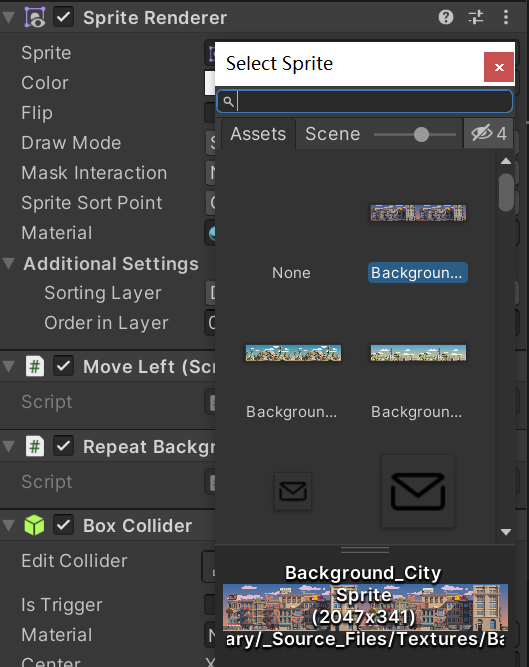
在 Scene 里找到 Background, 点开 Sprite Renderer , 选择一个你喜欢的图片作为背景。
接下来,在 Course Library > Characters 里选择一个你喜欢的人物,拖动到场景中。将人物重命名为 Player , 调整人物的 rotation Player 添加 Rigidbody 和 碰撞体积。
结束后,场景大概如下:
空格跳跃
在有重力的环境中,跳跃可以由为刚体施加一个力来实现,如:Rigidbody.Addforce(). 于是我们可以在每按下一次空格键,就为 Player 施加一个向上的力。在这里,为了获取 Player 的 Rigidbody 属性,我们使用 GetComponent函数。同时,为了防止二段跳,我们设置一个变量,使其在与地面碰撞之前都不能再次跳跃。
1
2
3
4
5
6
7
8
9
10
11
12
13
14
15
16
17
18
19
20
21
22
23
24
25
26
27
28
29
30
31
32
33
public class PlayerController : MonoBehaviour { private Rigidbody playerRb; public float jumpForce; public float gravityModifier; public bool isOnGround = true ; void Start () { playerRb = GetComponent<Rigidbody>(); Physics.gravity *= gravityModifier; } void Update () { if (Input.GetKeyDown(KeyCode.Space) && isOnGround) { playerRb.AddForce(Vector3.up * jumpForce, ForceMode.Impulse); isOnGround = false ; } } private void OnCollisionEnter (Collision collision ) { isOnGround = true ; } }
这里的 ForceMode.Impulse表示为物体施加的力在短时间内完成。gravityModifier 提升重力的 g 值,让 Player 可以更快地落地。
创建向左移动的障碍物
在 Course Library > Obstacles 里选择一个障碍物,拖动到 Scene 内并且重命名为 Obstacle . 为障碍物添加 Rigid Body 和 碰撞盒属性,调整碰撞盒大小。将编辑完成的障碍物存到新建的 Prefabs 文件夹内。
创建 MoveLeft 脚本,附加到障碍物上
1
2
3
4
5
6
7
8
9
10
11
12
13
14
15
16
17
18
public class MoveLeft : MonoBehaviour { private float speed = 30 ; void Start () { } void Update () { transform.Translate(Vector3.left * speed * Time.deltaTime); } }
在创建一个 SpawnManager (参考Unity学习_JuniorProgrammer_1.2_游戏玩法示例 ),附上如下脚本:
1
2
3
4
5
6
7
8
9
10
11
12
13
14
15
16
17
18
19
20
21
22
23
24
public class SpawnManager : MonoBehaviour { public GameObject obstaclePrefab; private Vector3 spawnPos = new Vector3(25 , 0 , 0 ); private float startDelay = 2 ; private float repeatRate = 2 ; void Start () { InvokeRepeating("SpawnObstacle" , startDelay, repeatRate); } void Update () { } void SpawnObstacle () { Instantiate(obstaclePrefab, spawnPos, obstaclePrefab.transform.rotation); } }
这样,每隔两秒会在 (25,0,0) 处创建一个向左移动的障碍物。
无尽模式
为了让玩家看起来在向右跑,我们需要让背景也同步向左移动。在这一小节,我们还会让越界的物体消失,并且在玩家与障碍物相撞的时候中止游戏。
让背景重复
为了让背景有无限长的错觉,我们可以在合适的时间重置背景的位置,使重置前和重置后的画面一致。按理说,这步需要精细地调整,使得重置发生的位置和游戏开始时候的位置一致。但好在我们的图片素材恰好是两张重复的图,所以我们只需要当图片向左移动二分之一的时候重置图片即可。
创建脚本 RepeatBackground, 附到 Background 上,内容如下:
1
2
3
4
5
6
7
8
9
10
11
12
13
14
15
16
17
18
19
20
21
public class RepeatBackground : MonoBehaviour { private Vector3 startPos; private float repeatWidth; void Start () { startPos = transform.position; repeatWidth = GetComponent<BoxCollider>().size.x / 2 ; } void Update () { if (transform.position.x < startPos.x - repeatWidth) { transform.position = startPos; } } }
这里我们选择GetComponent<BoxCollider>以便快速得获取图片的长度。如果图片本身没有box collider, 我们手动添加一个即可。
Game Over!
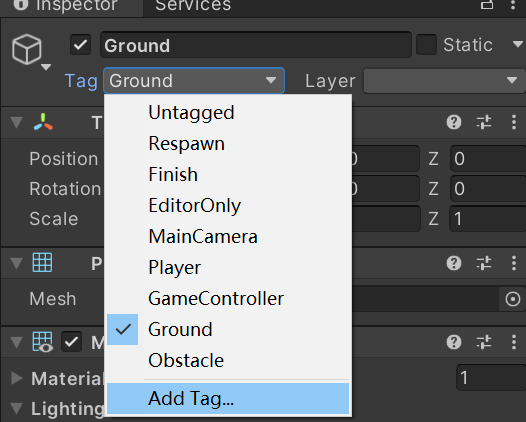
在这里,我们设计当 Player 和 Obstacle 相撞的时候,游戏结束。这里,我们不仅需要检测碰撞,还要判别碰撞是跟谁发生的。因为在这个场景下,Player 除了与 Obstacle 会碰撞,和地面也会碰撞。为了辨别与谁碰撞,我们可以为不同的物体添加不同的 tag . 选中物体后,在 Inspector处找到 tag ,点击 Add tag, 如下图所示:
为地面和 Obstacle预制体添加 tag , 分别为 Ground , Obstacle .
修改Player Controller 的代码为:
1
2
3
4
5
6
7
8
9
10
11
12
13
14
15
16
17
18
19
20
21
22
23
24
25
26
27
28
29
30
31
32
33
34
35
36
37
38
39
40
public class PlayerController : MonoBehaviour { private Rigidbody playerRb; public float jumpForce; public float gravityModifier; public bool isOnGround = true ; public bool gameOver = false ; void Start () { playerRb = GetComponent<Rigidbody>(); Physics.gravity *= gravityModifier; } void Update () { if (Input.GetKeyDown(KeyCode.Space) && isOnGround) { playerRb.AddForce(Vector3.up * jumpForce, ForceMode.Impulse); isOnGround = false ; } } private void OnCollisionEnter (Collision collision ) { if (collision.gameObject.CompareTag("Ground" )) { isOnGround = true ; } else if (collision.gameObject.CompareTag("Obstacle" )) { gameOver = true ; Debug.Log("Game Over!" ); } } }
这里我们用到了 gameObject.CompareTag来辨别与 Player 发生碰撞的到底是地面还是障碍物。
最后,我们需要让游戏结束时,背景和障碍物停止运动,并且停止生成新的障碍物。为此,我们需要修改 MoveLeft 的代码:
1
2
3
4
5
6
7
8
9
10
11
12
13
14
15
16
17
18
19
20
21
22
23
24
25
26
public class MoveLeft : MonoBehaviour { private float speed = 30 ; private float leftBound = -15 ; private PlayerController playerControllerScript; void Start () { playerControllerScript = GameObject.Find("Player" ).GetComponent<PlayerController>(); } void Update () { if (!playerControllerScript.gameOver) { transform.Translate(Vector3.left * speed * Time.deltaTime); } if (transform.position.x < leftBound && gameObject.CompareTag("Obstacle" )) { Destroy(gameObject); } } }
这里我们使用 GameObject.Find()函数找到名为 ‘Player’ 的 game object 并且得到它的 script 的引用。由于 Scripts 中的gameOver 是public的布尔变量,所以可以被从外部访问。
角色动画
角色动画窗口
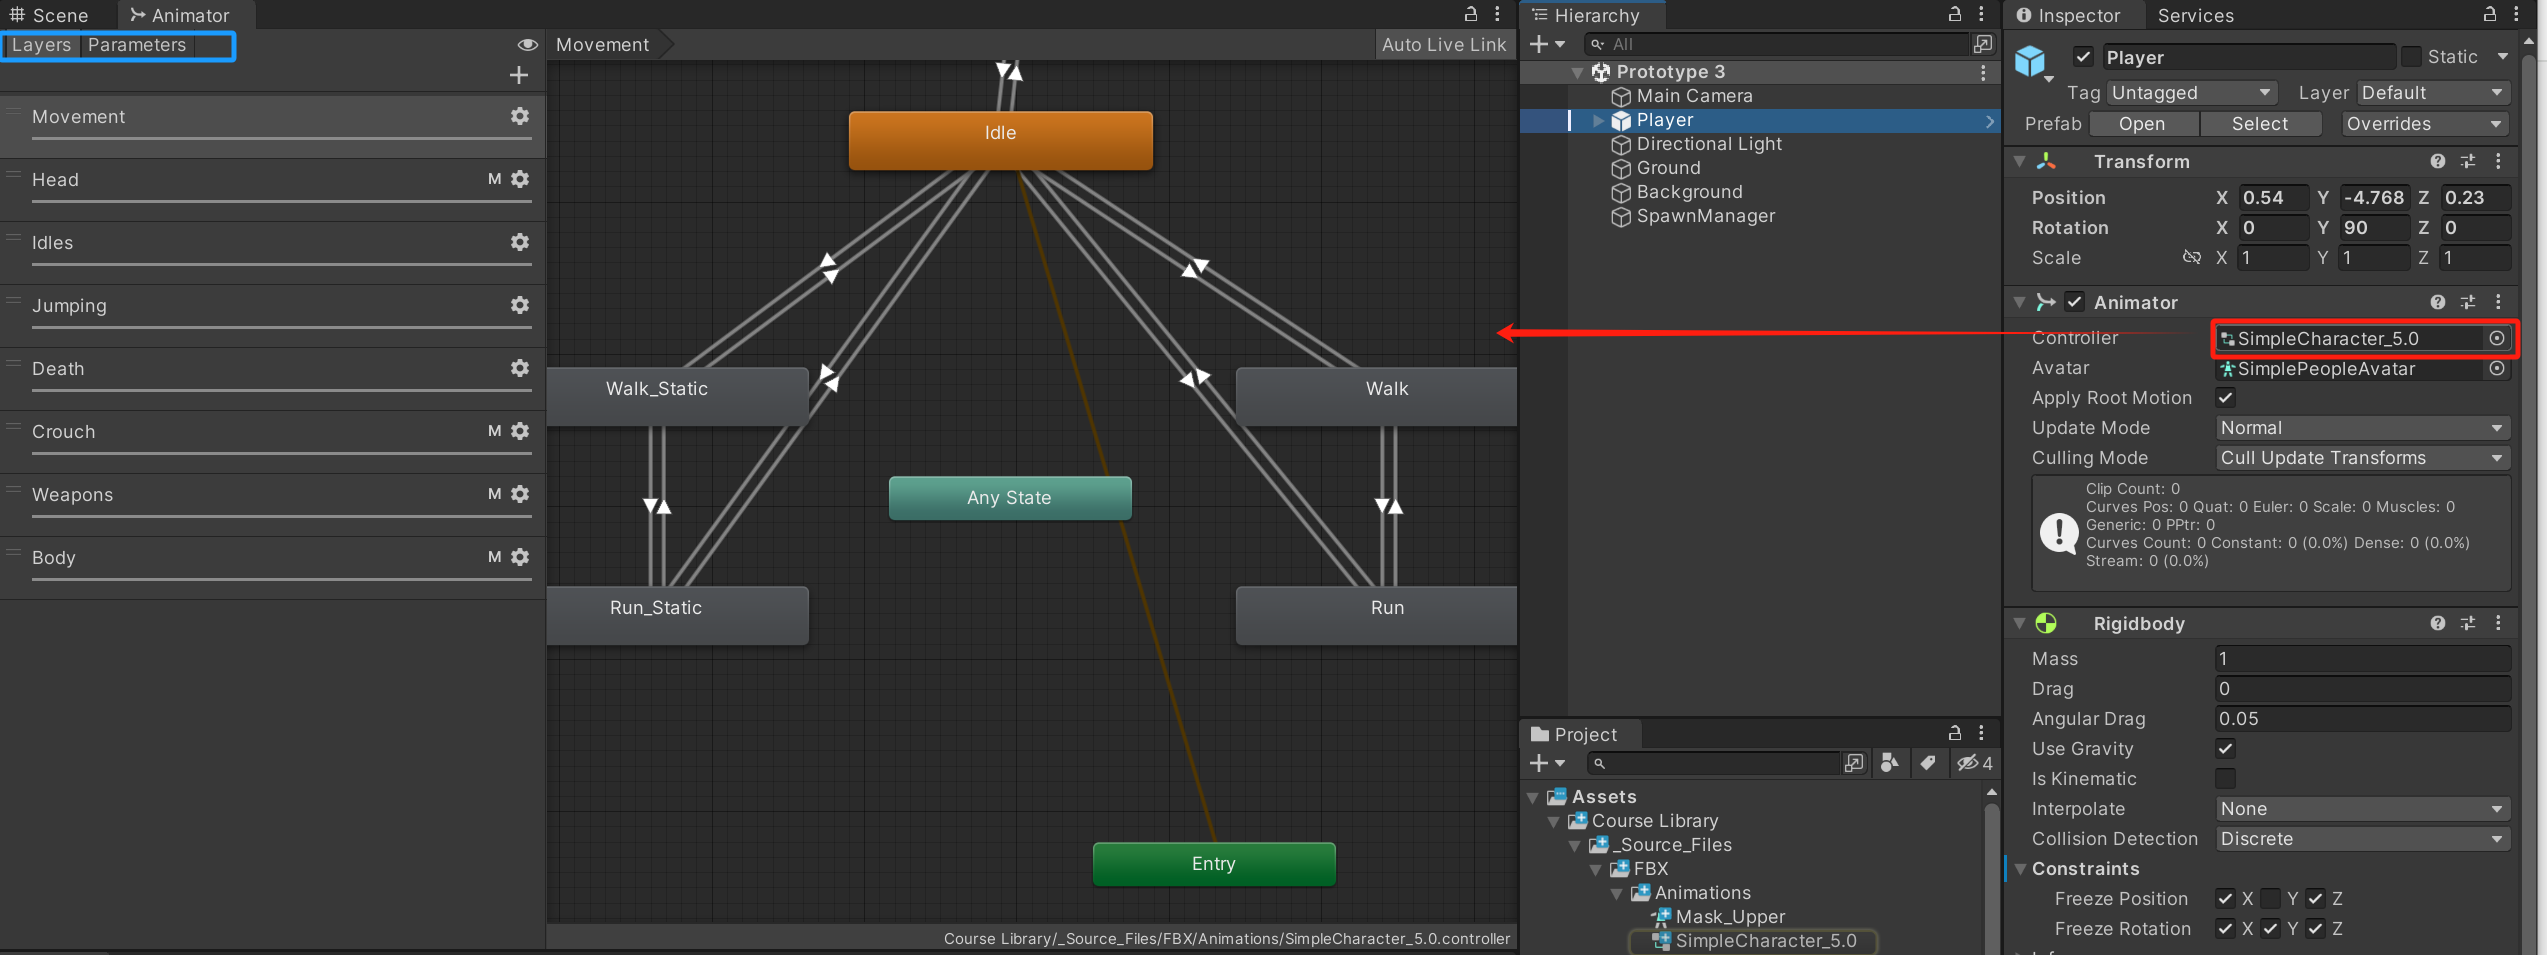
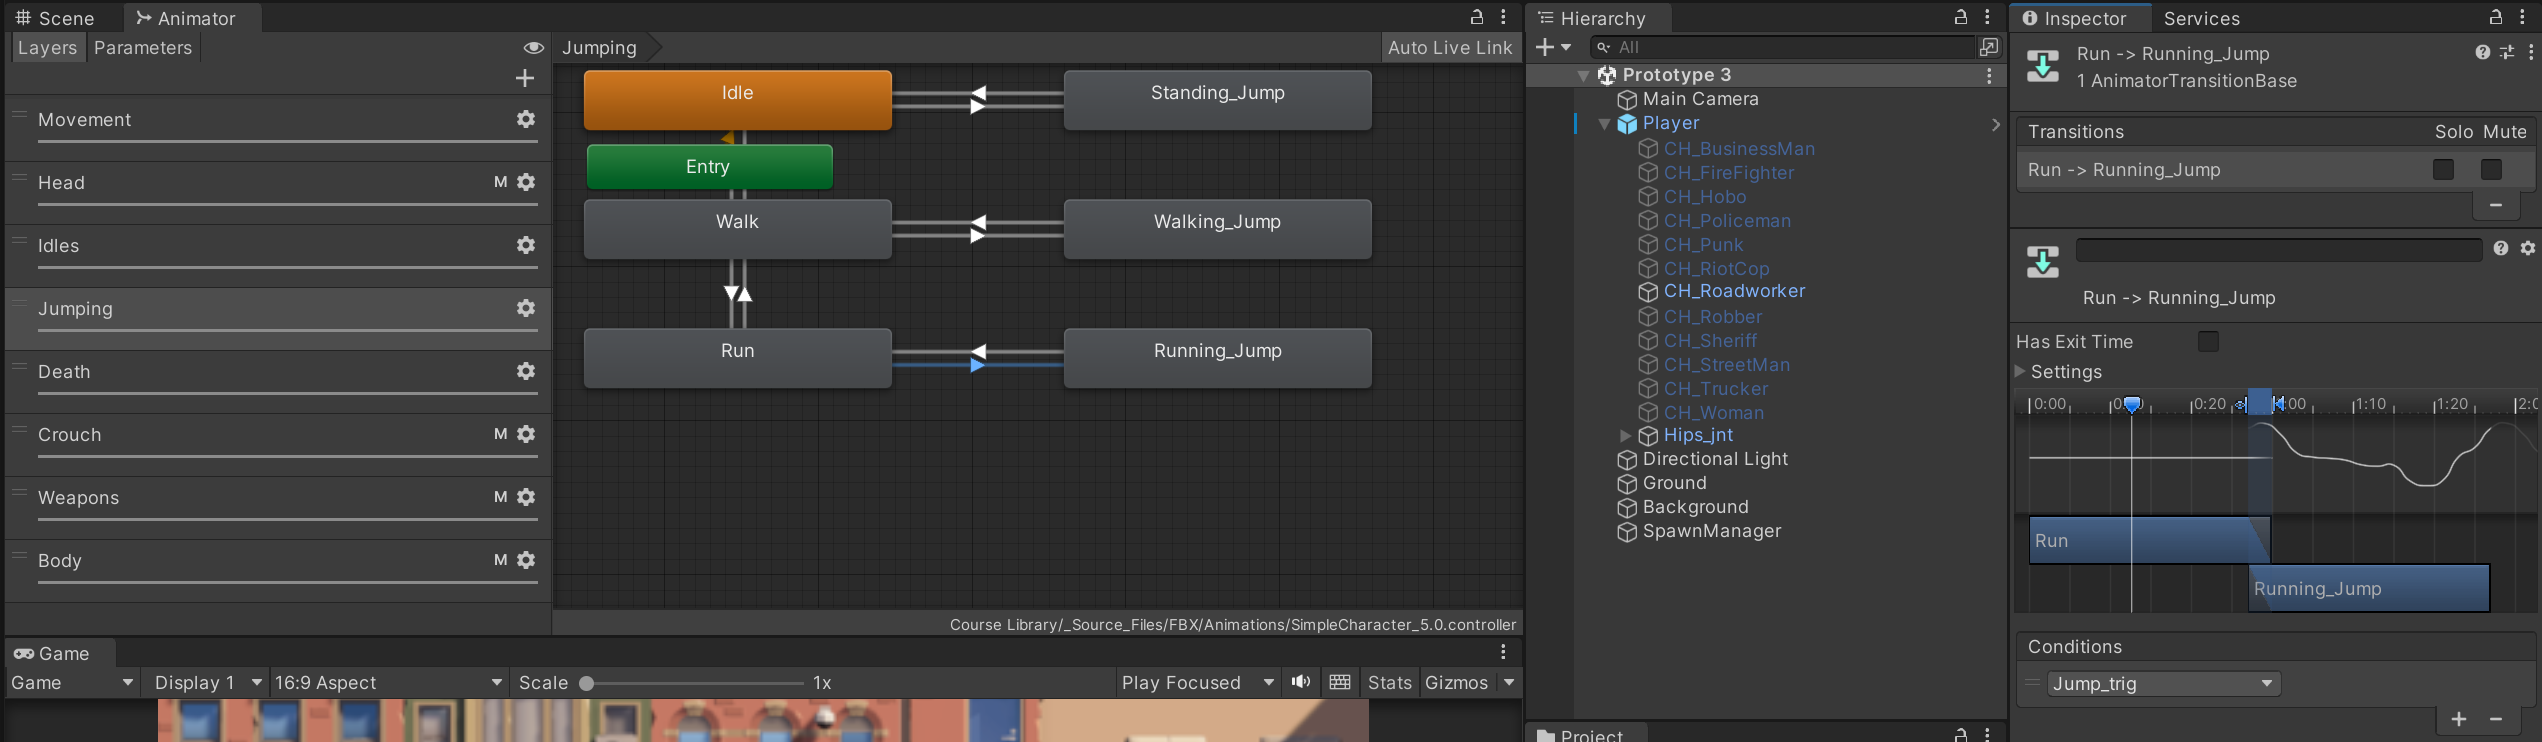
在 “Player” 的 Inspector 中找到 Animator 分支并且双击 Controller. 我们会进入角色动画的状态机界面,如下图所示
图中的 Movement 窗口中的每一个节点对应一个或者一段动作,有箭头链接的动作表示动作可以从一个转换到另一个。左上角的 Layer 窗口中,每一个 Layer 都存有这样的一个 graph.
点击某一个箭头(如下图),在右边可以看到箭头发生,即动画转换需要的 condition,以及你可以在 Parameter 窗口设置这些参数。
动画的Layer
熟悉图片编辑的同学可能会知道图层这一概念,这里的 Layer 就有点像 PhotoShop 中的图层。
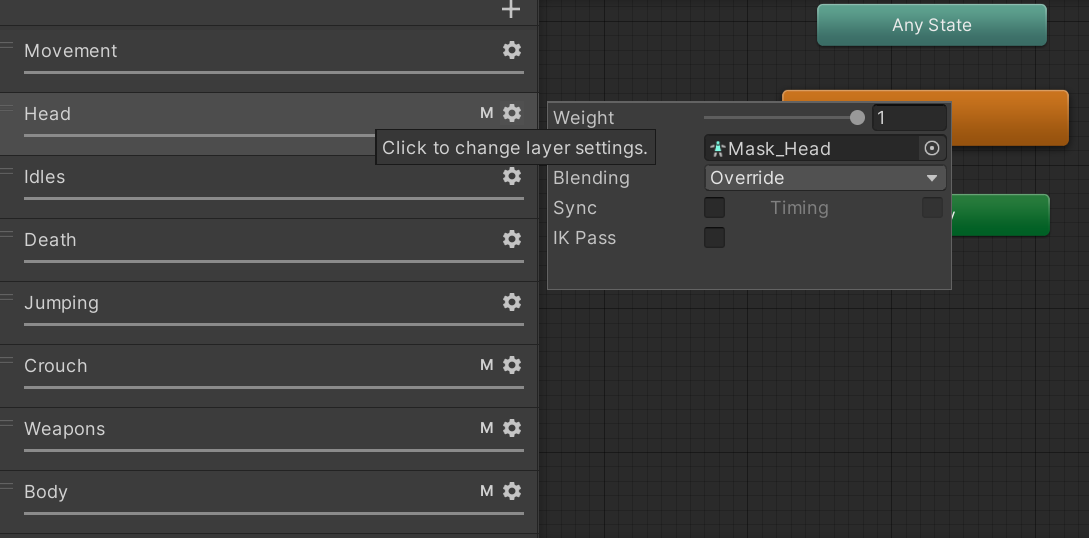
点击动画中 Layer 的齿轮图标,可以看到一个菜单。 其中
Weight 代表这一层的权重(0到1),0代表这一层的动画不体现,1代表这一层的动画会完全体现。
Mask 可以设置改层控制身体的哪一部分,有 mask 的层会在 Layer 旁边有一个小 ‘M’ 表示。
Blending 可以控制混合模式,是覆写上一层的动画,还是加在上一层的 Layer 之上。
在动画层中,越往下的层数优先级越高。更加详细的介绍可以点击此处 .
让人物跑起来!
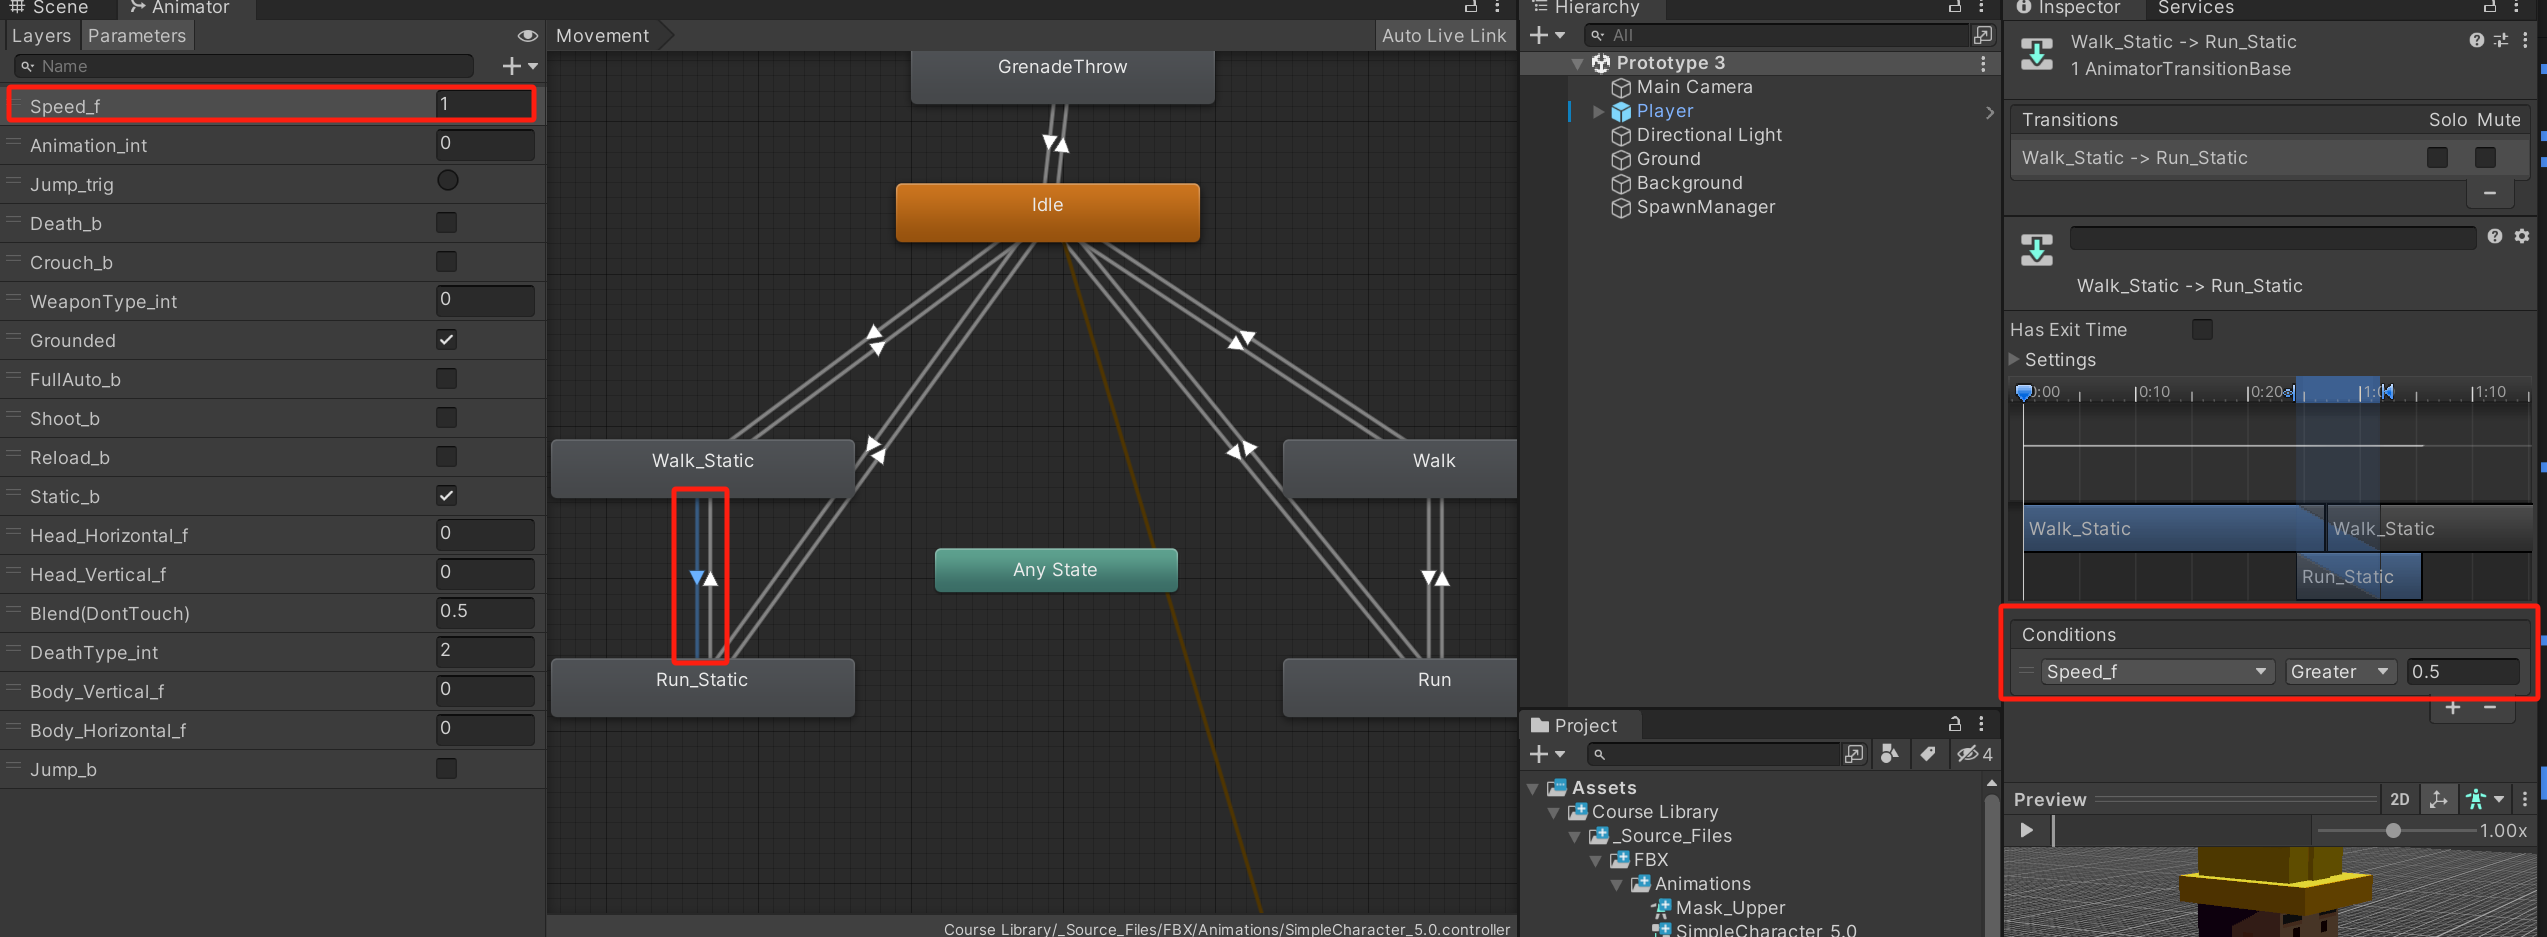
现在当游戏开始的时候,默认的状态是 Idle,即 Entry 节点连接的节点。右键 Run_static, 将其设为这一层 Layer 的默认节点。在 Parameter 中, 将 speed_f 的数值改成1,以免游戏开始之后从跑自动变成不动的姿态。最后,我们可以选中 Run_static 在右侧的 Inspector 中调整 speed
添加跳跃和死亡动作
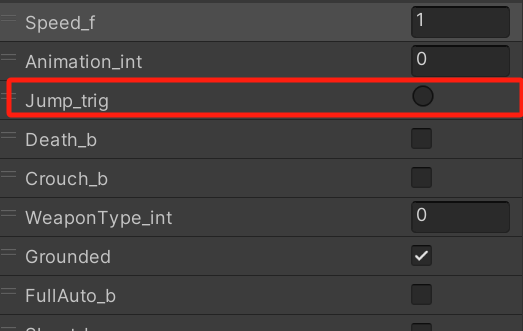
在动作模组的 Jumping Layer 里,我们可以找到跑步和跑步中跳跃的动作。点击链接的箭头,发现从 Jump 到 Running_jump 的触发条件为 Jump_trig.
在 Parameters 中,我们可以找到 Jump_trig 为一个 trigger 开关,我们需要在代码里执行跳跃的时候触发这个trigger,使角色进行跳跃动作。
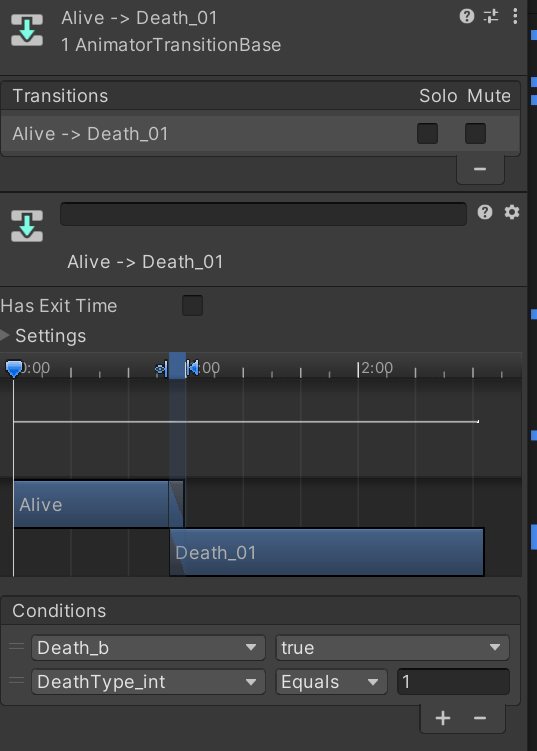
同时,在死亡动画 Death 中,我们可以看到两组死亡动画,动画01是向后倒,动画02是向前倒。在我们的游戏中,向后倒比较符合游戏表现。死亡动画1的条件是 Death_b 为真,DeathTpye_int 为1.
在代码 PlayerController中,对应的方法添加:
1
2
3
4
5
6
7
8
9
10
11
12
13
14
15
16
17
18
19
20
21
22
23
24
25
26
27
28
29
30
31
32
33
34
35
36
37
38
39
40
41
42
43
44
45
46
public class PlayerController : MonoBehaviour { private Rigidbody playerRb; private Animator playerAnim; public float jumpForce; public float gravityModifier; public bool isOnGround = true ; public bool gameOver = false ; void Start () { playerRb = GetComponent<Rigidbody>(); playerAnim = GetComponent<Animator>(); Physics.gravity *= gravityModifier; } void Update () { if (Input.GetKeyDown(KeyCode.Space) && isOnGround && !gameOver) { playerRb.AddForce(Vector3.up * jumpForce, ForceMode.Impulse); isOnGround = false ; playerAnim.SetTrigger("Jump_trig" ); } } private void OnCollisionEnter (Collision collision ) { if (collision.gameObject.CompareTag("Ground" )) { isOnGround = true ; } else if (collision.gameObject.CompareTag("Obstacle" )) { gameOver = true ; Debug.Log("Game Over!" ); playerAnim.SetBool("Death_b" , true ); playerAnim.SetInteger("DeathType_int" , 1 ); } } }
添加声音和特效
爆炸特效
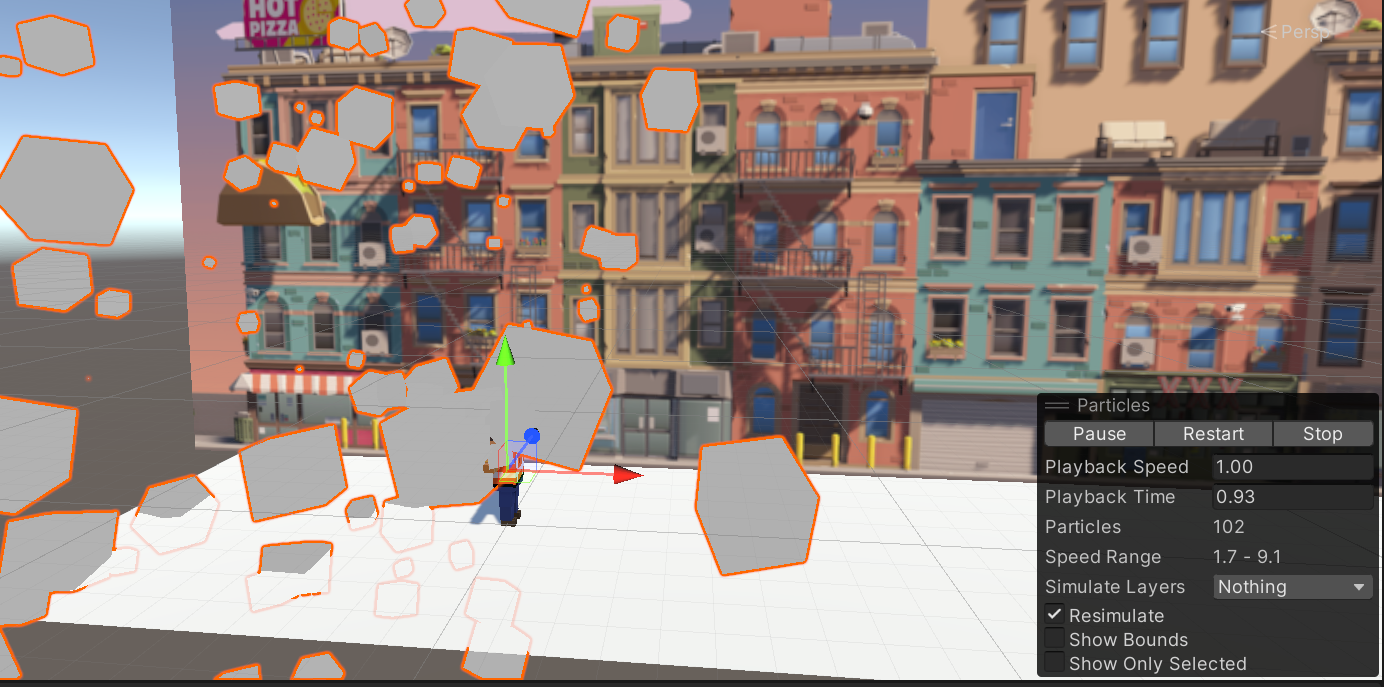
在 Course Library > Particles 中找到 FX_Explosion_smoke 特效,拖动到 Scene 中,并且附加到人物下面,使其成为人物的子物件。
在上图中,你可以在蓝色的方框内重复播放粒子特效,并且可以在 Inspector 里对粒子特效进行很多设置,记得不要勾选 Play on Awake. 调整一下粒子特效的位置,让它看起来像是在人物身上引爆的!
接下来,在 PlayerController中对应位置添加
1
2
3
4
5
6
7
8
9
10
11
12
13
14
15
16
17
public ParticleSystem explosionParticle; ... private void OnCollisionEnter (Collision collision ) { if (collision.gameObject.CompareTag("Ground" )) { isOnGround = true ; } else if (collision.gameObject.CompareTag("Obstacle" )) { ... explosionParticle.Play(); } }
,最后将 Player 下的粒子特效拖到刚添加的公有变量 explosionParticle 里,这样当人物与障碍物相撞的时候就有爆炸啦。
跑步喷溅特效
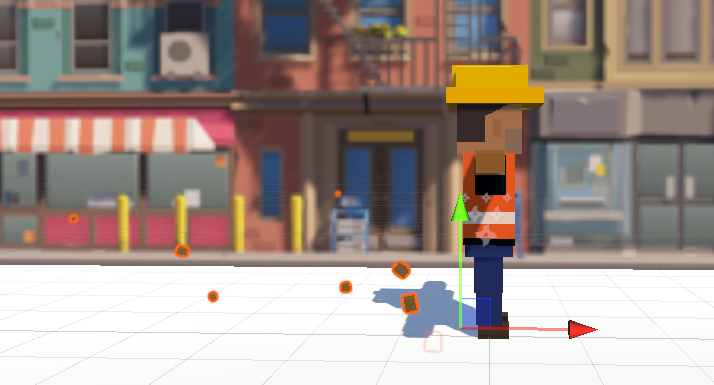
将 Particle 文件夹下的 FX_DirtSplatter 同样附加为人物的子物件,调整一下特效的角度和位置,让它看起来像是在朝后方喷溅,并且勾上 Play on Awake.
最后在 PlayerController中添加代码让跳跃时候和死后停止播放。
1
2
3
4
5
6
7
8
9
10
11
12
13
14
15
16
17
18
19
20
21
22
23
24
25
26
27
28
public ParticleSystem dirtSplatter;void Update (){ if (Input.GetKeyDown(KeyCode.Space) && isOnGround && !gameOver) { ... dirtSplatter.Stop(); } } private void OnCollisionEnter (Collision collision ){ if (collision.gameObject.CompareTag("Ground" )) { ... dirtSplatter.Play(); } else if (collision.gameObject.CompareTag("Obstacle" )) { ... dirtSplatter.Stop(); } }
添加音乐
Unity 中的声音和现实是一样的,想要播放声音,需要有一个 Audio Source 和 Audio Listener. 为 Main Camera 添加一个 Audio Source , 并且在 Course Library>Sound>Music 中选择一段音乐拖到 AudioClip 上.
跳跃和撞击音效
首先为 Player 创建一个 Audio Source , 然后在 PlayerController 中添加:
1
2
3
4
5
6
7
8
9
10
11
12
13
14
15
16
17
18
19
20
21
22
23
24
25
26
27
28
29
public AudioClip jumpSound; public AudioClip CrashSound; private AudioSource playerAudio; ... void Start () { ... playerAudio = GetComponent<AudioSource>();} void Update (){ if (Input.GetKeyDown(KeyCode.Space) && isOnGround && !gameOver) { ... playerAudio.PlayOneShot(jumpSound, 1.0f ); } } private void OnCollisionEnter (Collision collision ) { if (collision.gameObject.CompareTag("Ground" )&&!gameOver) { ...} else if (collision.gameObject.CompareTag("Obstacle" )) { ... playerAudio.PlayOneShot(CrashSound, 1.0f ); }}
记得自选一个音效拖到 jumpSound 和 crashSound!这里用了 PlayOneShot方法来播放一次音效切片。
结束!